Step 1: Duplicate The Background Layer
Let’s begin by making sure our original image will remain safe and unharmed while we’re creating the effect. If we look in my Layers panel, we see that my original photo is sitting on the Background layer, which is the only layer I currently have in my document:
The Layers panel showing the original photo on the Background layer.
Let’s make a copy of this layer, which will serve as our working copy of the image. Go up to the Layer menu in the Menu Bar along the top of the screen, choose New, then choose Layer via Copy. Or, for a faster way to copy a layer, press Ctrl+J (Win) / Command+J (Mac) on your keyboard. Either way will work:
Go to Layer > New > Layer via Copy.
We now have a copy of the image on our new layer, Layer 1,
which is sitting above the Background layer. Layer 1 is highlighted in
blue, which tells us it’s the currently active layer. This means that
whatever we do next will be applied to Layer 1, while the original photo
on the Background layer remains unharmed:
Layer 1 is now our working copy of the image.
Step 2: Select The Iris Blur Filter
Next, we’ll select the Iris Blur filter. Go up to the Filter menu at the top of the screen, choose Blur, then choose Iris Blur (second from the top):
Go to Filter > Blur > Iris Blur.
This opens the new Blur Gallery, with our photo appearing in the preview area that takes up most of the screen. In the top right corner of the Blur Gallery is the Blur Tools panel displaying the options for the Iris Blur filter – a single Blur
slider that can be used to control the blur amount. We’re not actually
going to be using the Blur slider here because all of the controls we
need can be found in the preview area itself, so for this tutorial at
least, you can ignore the panels along the right side of the gallery: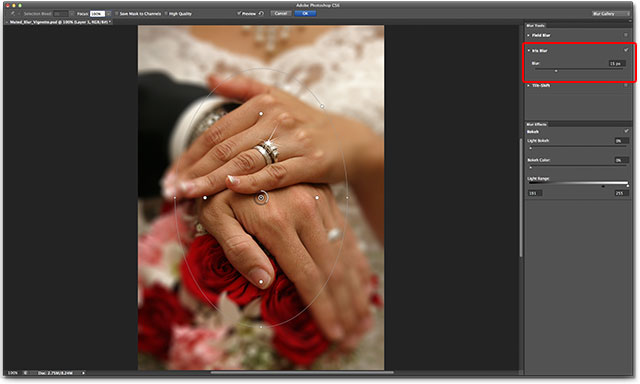
The Blur Gallery.
Step 3: Set The Blur Amount
If we look at our photo in the preview area, we see a collection of dots and curved lines overlaying the image. They’re actually all part of the same pin which is used to control exactly how and where the blur effect is applied. We can add more pins to the image if needed for even more control over the blurring, but for our vignette effect, the initial pin that Photoshop adds for us is all we need.If you look at the center point of the pin, you’ll see an outer ring around it. This ring serves as a dial that lets us increase or decrease the blur amount simply by turning the dial. Hover your mouse cursor over the ring, then click and, with your mouse button held down, drag clockwise around the ring to increase the blur amount, or drag counterclockwise to decrease it. Photoshop gives you a live preview of the blur amount as you drag, and the HUD (Heads-Up Display) tells you the exact blur amount in pixels. I’m going to set my blur amount to 12 pixels:
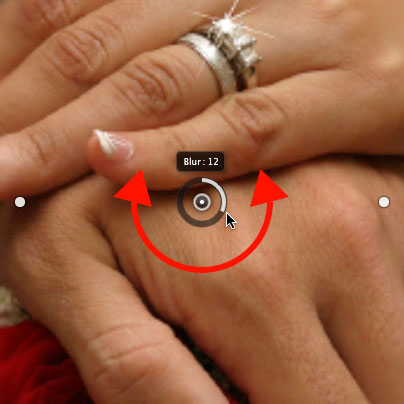
Click and drag around the ring to increase or decrease the blur amount.
Step 4: Set The 100% Point
See that thin, curved outer line that surrounds everything else? That line is the 100% point for the blur effect. Everything outside of this line gets 100% of your blur amount applied to it. If you look closely, you’ll see four small round dots around the line, one at the top, bottom, left, and right. Hold down your Shift key, then click on the dot at the top and, with your mouse button held down, drag it upward to move the 100% line closer to the top edge of the image. Leave a bit of room between the dot and the edge. The bottom dot will move outward along with it, pushing the bottom of the line down towards the bottom edge. Holding the Shift key as you drag makes it easier to drag vertically in a straight line: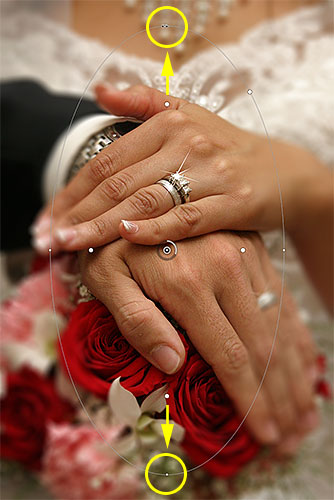
Hold Shift, then click and drag the top point upward. The bottom point moves with it.
Then, click on the dot either on the left or right side of the line and, again while holding Shift,
drag it outward towards the edge of the photo, leaving a bit of room
between the dot and the edge. Moving one of the side dots will move the
other along with it but in the opposite direction. This time, holding
Shift as you drag makes it easier to drag horizontally in a straight
line: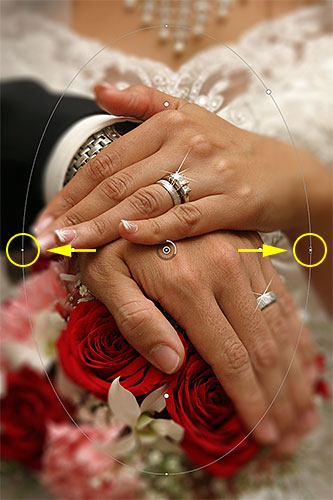
Hold Shift, then click and drag either of the side points outward. The other point moves with it.
Step 5: Set The Transition Area
The four larger dots between the pin’s center point and the outer 100% line control the width of the blur’s transition area. The area of the photo that falls between the center point and the transition dots is protected from the blur effect. The effect then begins at the transition dots and gets gradually stronger as you progress outward until it reaches full strength at the 100% line. Clicking and dragging any of the four dots will move all four of them together. Drag them closer to the pin’s center point to create a wider, more subtle blur transition, or closer to the outer 100% line for a more narrow and abrupt transition: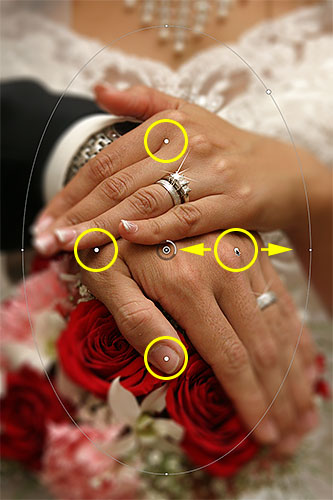
Click and drag any of the four larger dots to adjust the size of the transition area.
Step 6: Select The “Save Mask To Channels” Option
Before we apply the blur effect to the image, select the Save Mask to Channels option in the Options Bar along the top of the screen. Even though it seems like we haven’t been using one, Photoshop has been busy creating a layer mask for us behind the scenes as we’ve been working in the Blur Gallery, and by choosing this option, we’ll actually be able to use the layer mask when we’re done:
Click inside the checkbox to select the “Save Mask to Channels” option.
Step 7: Apply The Blur Effect To The Image
When you’re ready, press Enter (Win) / Return (Mac) on your keyboard to apply the blur effect to the image and exit out of the Blur Gallery. Here’s what my photo looks like so far: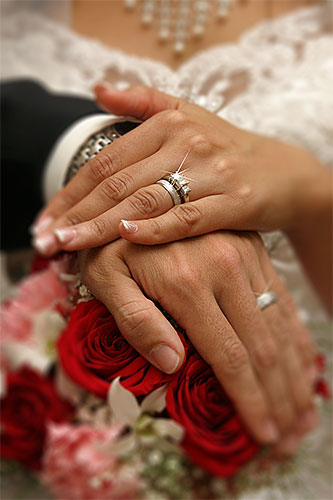
The photo after applying the Iris Blur filter.
Step 8: Load The Layer Mask As A Selection
Now that we’re back in Photoshop’s main interface, switch over to the Channels panel by clicking on its name tab. By default, Channels is grouped in beside the Layers panel:
Click the name tabs to switch between panels.
You’ll find the layer mask we just created saved as an alpha channel named Blur Mask
below the Red, Green, and Blue channels. We need to load this Blur Mask
channel as a selection in our document. To do that, hold down your Ctrl (Win) / Command (Mac) key on your keyboard and click anywhere on the channel:
Hold Ctrl (Win) / Command (Mac) and click on the Blur Mask channel.
The selection outline will appear above the image: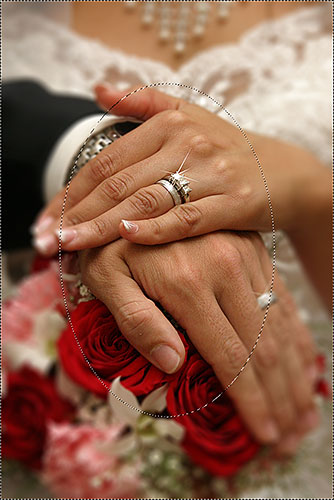
The channel has been loaded as a selection.
Switch out of the Channels panel and back over to the Layers panel when you’re done by clicking on the Layers name tab:
Switching back to the Layers panel.
Step 9: Add A Levels Adjustment Layer
With the selection active, go to the Adjustments panel and click on the Levels icon (second from the left, top row) to add a Levels adjustment layer to the document:
Choose Levels in the Adjustments panel.
The new Levels adjustment layer appears above Layer 1 in the Layers
panel, and because we had a selection active, Photoshop used the
selection to create and define a layer mask for the adjustment layer, as we can see by looking at the layer mask thumbnail.
The black area in the center of the mask is the area that was
originally being protected from the effects of the Iris Blur filter.
This same area will now be protected from whatever we do with the Levels
adjustment layer:
Photoshop converted the selection into a layer mask.
Step 10: Change The Blend Mode Of The Adjustment Layer To Screen
So what are we going to do with this Levels adjustment layer? As it turns out, not very much. The actual controls for the adjustment layer appear in the Properties panel, which is new to Photoshop CS6, but we’re not going to touch anything there. Instead, all we’re going to do is change the blend mode for the layer from Normal (the default blend mode) to Screen:
Change the adjustment layer’s blend mode to Screen.
With the blend mode set to Screen,
the Levels adjustment layer instantly lightens the blurred area around
the center of the image, while the area in the center, which is being
protected by the layer mask, remains unaffected: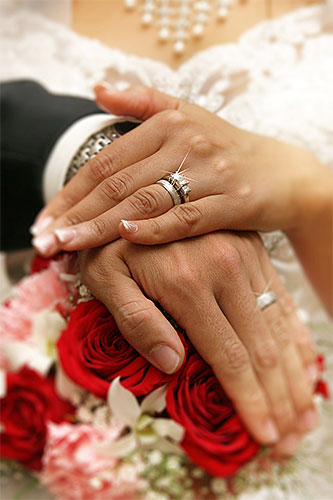
The blurred area now appears lighter.
If you find that things look too bright, you can reduce the intensity
of the adjustment layer by lowering its opacity value. You’ll find the
Opacity option directly across from the Blend Mode
option at the top of the Layers panel. The further you lower the opacity
value below 100% (the default value), the more you’ll reduce the
intensity. In my case, though, I’m going to leave the opacity set to
100%:
Lower the Opacity value of the Levels adjustment layer if needed.
Step 11: Reload The Layer Mask As A Selection
Hold down the Ctrl (Win) / Command (Mac) key on your keyboard once again and this time, click directly on the layer mask thumbnail:
Hold Ctrl (Win) / Command (Mac) and click on the mask thumbnail.
This will reload the mask as a selection outline above the image: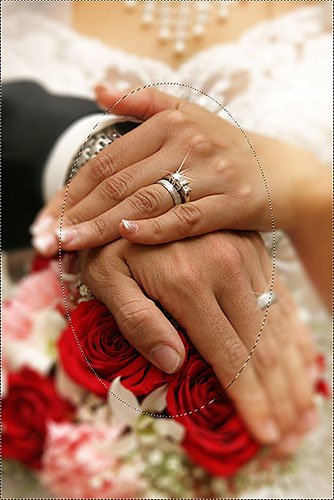
The selection outline reappears.
Step 12: Add A Vibrance Adjustment Layer
To complete the effect, we’ll lower the saturation of the colors in the blurred area to give them a more faded appearance. Go to the Adjustments panel and click on the Vibrance icon (far right, top row) to add a Vibrance adjustment layer:
Add a Vibrance adjustment layer.
The new Vibrance adjustment layer appears above the Levels layer, and
once again we see that Photoshop has used our active selection to
define a layer mask so that the area in the center of the photo will be
protected from the changes we’re about to make:
The Vibrance adjustment layer has a similar layer mask applied to it.
Step 13: Lower The Vibrance Amount
The controls for the Vibrance adjustment layer appear in the Properties panel (which we’re actually going to use this time). Drag the Vibrance slider towards the left to decrease color saturation in the blurred area. The Vibrance control affects colors differently depending on their original saturation levels, and even if you drag the Vibrance slider all the way to the left (to a value of -100), a hint of color will still remain (unlike the Saturation slider which affects colors equally and would remove the color completely). For my image, I’m not going to drag the slider that far. A Vibrance value of around -50 works well:
Lower the color saturation by dragging Vibrance towards the left.
And with that, we’re done! Here, for comparison, is my original photo once again: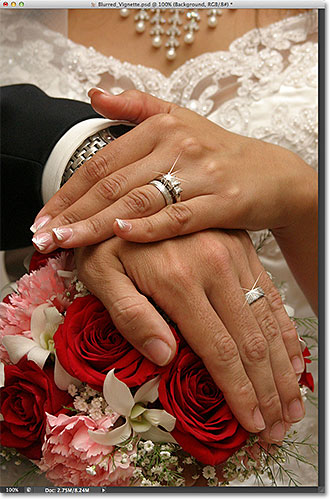
The original image.
And here, after reducing the color saturation, is my final “blurred vignette” effect: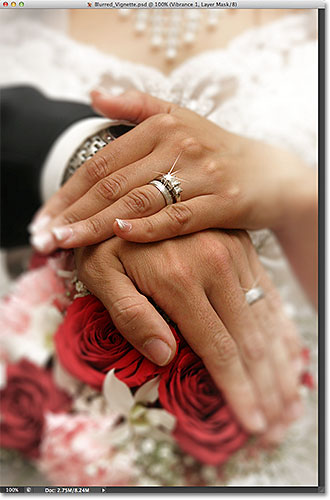
The final result.