Final Image Preview

Start working by creating a new document (
Ctrl+N) in
Adobe Photoshop CS5 with the size
1050px by
1680px (
RGB color mode) at a resolution of
72 pixels/inch. Click on
Add a layer style icon from bottom part of the
Layers panel and select
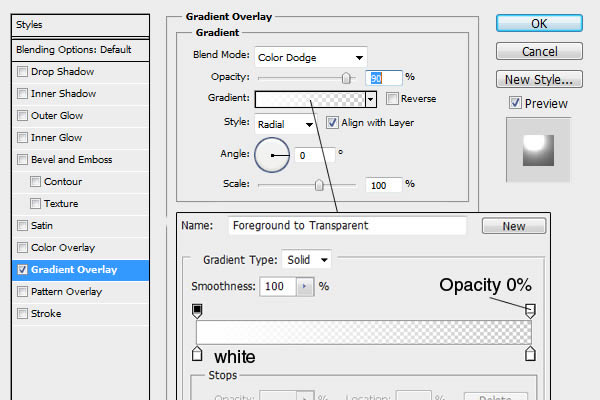
Gradient Overlay.
Blending Options>Gradient Overlay

Click in the
color bar to open the
Gradient Editor and set the
color stops as shown. Click
OK to close the
Gradient Editor dialog box.

We’ve got the next background:
 Create a new layer
 and select the
Paint Bucket Tool (G) to fill the new layer with
#3B4E6C color.

Insert the mask on the layer by choosing
Add layer mask on the bottom part of the
Layers panel and select after that
Filter>Render>Clouds. Select after that the
Soft Round brush from
Brush Tool (B).

Paint in the mask using this brush to clean up the top part of the canvas as shown. The brush’s color is
black.
 Create a new layer
 and select the
Soft Round.

Use this brush to represent many dots with
#536874 color.

Find a stock photo with a model represented on it, I used this
photo from
Shutterstock. I would like to thank the
author of this photo, or if you prefer, you can substitute similar image of your own.

Remove the background using your favorite tools like
Pen Tool (P),
Magic Wand Tool (W),
Magnetic Lasso (L) or even a simple
Filter>Extract and insert it on a
new layer in our main document.
 Create the next new layer
 on which we’ll use again the
Soft Round brush.

Use this bush to insert more dots of
green color. Place the layer under the layer containing the model’s image (on the
Layers’ panel).

Set
Fill to
48% for this layer and click on
Add a layer style icon from bottom part of the
Layers panel and select
Satin.

We’ve got the next result:

Make sure now that the layer with the model is selected and click on the bottom part of the
Layers panel to Create new fill or adjustment layer, select from the list Curves.

Adjust the curve shape as shown to make a little color corrections.

Hold down
Alt (Windows) or
Option (Mac OS) and click between the model’s layer and the
Curves adjustment layer in the
Layers panel to create a
clipping mask.

We’ve got the next result:
 Create a new layer
 and select the
Soft Round brush.

Use this brush to paint on the model certain places as shown. The brush’s color is
#070424 (set
Opacity to
40% in
Options bar).

Hold down Alt (Windows) or Option (Mac OS) and click between layers in the Layers panel to create the next clipping mask.

We’ve got the next result: